There are openHAB add-ons available for sending different types of notifications from within your openHAB based smart home environment. I will pick three of them and show the basic configuration, which can be adapted to your own needs. We will talk about the following notification types:
- Notifications sent as mobile push notification.
- Notifications sent as mail.
- Notifications sent to a Telegram chat.
We will define one switch item per notification type and show them in the Basic UI. Once we trigger one of these switches, a notification type specific rule will run and send the notification. After the notification is sent, the switch will change back to the off state.
We start with the basic setup of necessary items and the sitemap for the Basic UI. After that we continue with a closer look on the necessary configuration for each notification type.
Prerequisites
This blog post requires a running openHAB instance and basic knowledge regarding add-on installation and openHAB configuration. All explanations are based on openHAB 2.3 but will most likely also work with different versions.
If you don’t have an openHAB instance yet, you can have a look at one of my previous blog posts, which describes the installation of openHAB on a Raspberry Pi. In case you are not yet familiar with the add-on installation process, there is a good documentation available on the openHAB website. We will use the Paper UI based approach.
All file system paths I mention are valid for an APT based installation. This is e.g. the case, if your instance runs on Raspbian and you used the available installation package. For further details please have a look at the documentation.
Basic Setup of Items and Sitemap
We first need to create all necessary items. They are defined in an item file (in my case it’s /etc/openhab2/items/notifications.items). We need one switch item per notification type. Enabling one of the switches will later trigger a rule for sending the notification.
Switch  Send_via_App_Switch         "Send via App"      <switch>
Switch  Send_via_Mail_Switch        "Send via Mail"     <switch>
Switch  Send_via_Telegram_Switch    "Send via Telegram" <switch>
Those switches should be shown in the Basic UI. That’s why we create a sitemap file (in my case /etc/openhab2/sitemaps/notifications.sitemap) with the content shown below.
sitemap notifications label="Notifications" {
    Frame label="Notifications" {
        Switch item=Send_via_App_Switch
        Switch item=Send_via_Mail_Switch
        Switch item=Send_via_Telegram_Switch
    }
}
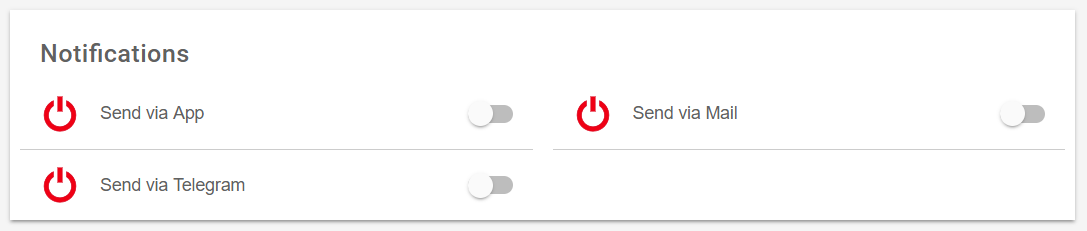
Once those items and the sitemap are created, you can open the Basic UI to check the result. Please make sure to use the sitemap we recently created. The page should look similar to the screenshot below.
Send Mobile Push Notifications
We will have a closer look at sending mobile push notifications with openHAB Cloud. It offers the possibility to send mobile push notifications to a smartphone, which has the openHAB app installed and is connected to an openHAB Cloud account. The proper setup of an openHAB Cloud connection consists of the following steps:
- Install the openHAB Cloud Connector.
- Create an account on myopenhab.org if you don’t have one yet.
- Install the iOS or Android app on your smartphone.
- Connect the app to your openHAB Cloud account.
Those steps are described in the openHAB docs. You are also welcome to read one of my previous blog posts, which describes this in more detail.
We can now add a rule for sending the mobile push notification once the switch in the Basic UI is triggered. We need a rule similar to the one below in a rule file (in my case /etc/openhab2/rules/notifications.rules).
rule "Send Mobile Push Notification"
when
    Item Send_via_App_Switch changed
then
    if(Send_via_App_Switch.state == ON)
    {
        logInfo("notifications", "Sending notification via app.")
        sendNotification("<recipient_mail_address>",
            "This is our notification sent via app.")

        Send_via_App_Switch.postUpdate(OFF)
    }
end
This rule checks, if the state of the switch changed. If the status changed to on, a log message is written and the notification is sent via the sendNotification command, which takes two parameters. After the notification was sent, the switch is turned off again.
- The first parameter is the mail address of the recipient user. It must be assigned to the openHAB Cloud account your smart home environment is connected to. Of course this needs to be the same mail address you configured in the smartphone app.
- The second parameter is the message to send.
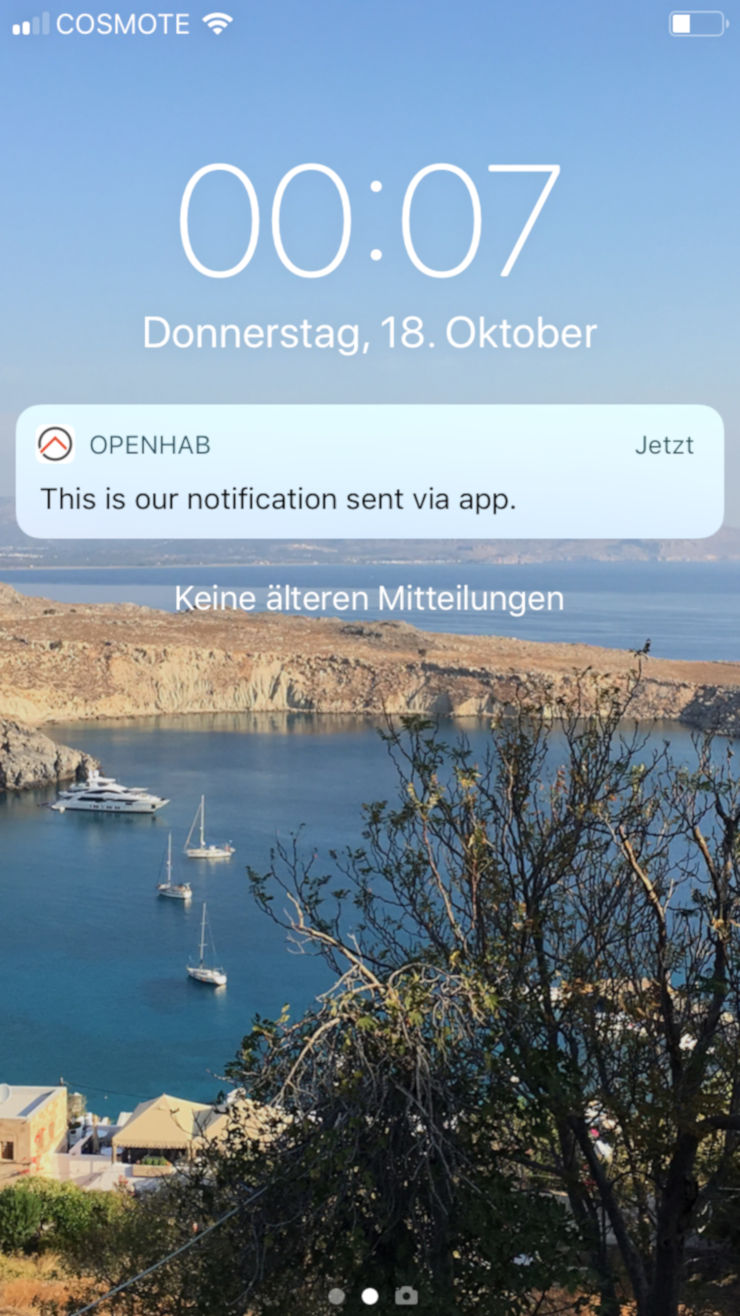
If we now trigger the switch in the Basic UI, the notification is sent to the app which displays it as push notification on the smartphone. The notification on my smartphone is shown in the image below.
Send Mail Notifications
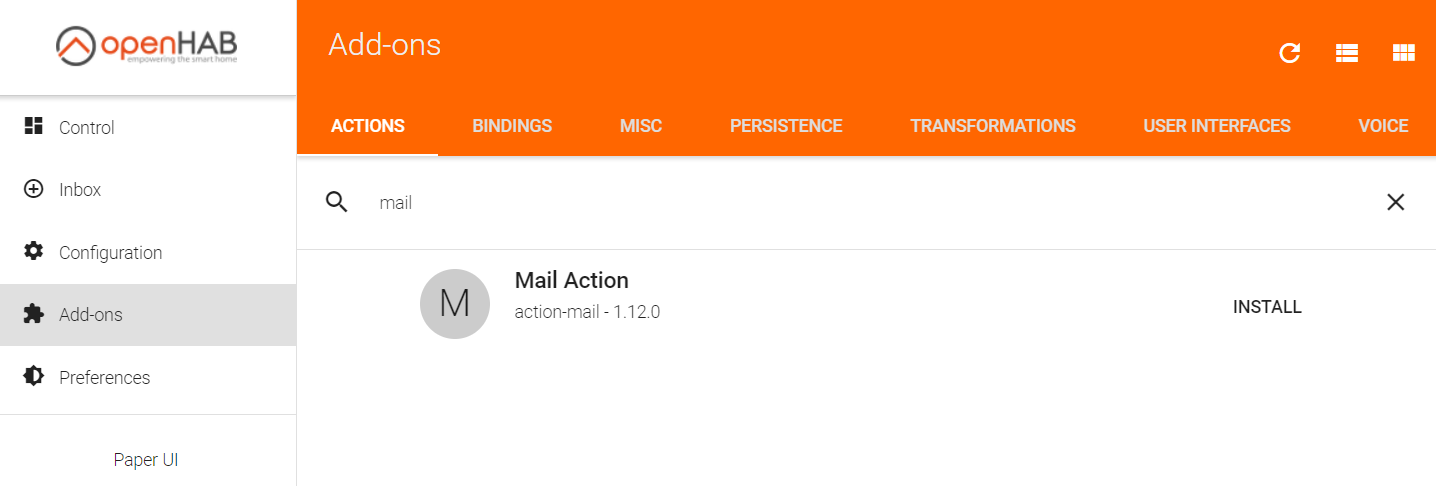
For sending mail notifications, we need to install the Mail add-on. I did this by using the the Paper UI like shown in the screenshot below. Just search for the add-on and click on install. There is also a documentation available.
After the installation finished, you will find a new file named mail.cfgin the /etc/openhab2/services directory. The default file contains many comments which show how to configure the add-on. Below you will find the most relevant settings. They define the SMTP account used for sending the mails. Please make sure to set your specific values.
hostname=<your_smtp_hostname>
username=<your_smtp_username>
password=<your_smtp_password>
from=openHAB System <<sender_mail_address>>
ssl=true
With this configuration done we can now add a new rule in the rule file (in my case /etc/openhab2/rules/notifications.rules). The most relevant part is the sendMail command, which has some parameters. The rest is similar to the app notification rule.
- The first parameter defines the mail address of the recipient.
- The second one defines the subject.
- The third one defines the text to send.
The rule is shown below. Please make sure to adjust the parameters according to your needs. There are more features available, which are explained in the documentation. You can e.g. add one or more attachments.
rule "Send Notification via Mail"
when
    Item Send_via_Mail_Switch changed
then
    if(Send_via_Mail_Switch.state == ON)
    {
        logInfo("notifications", "Sending notification via mail.")
        sendMail("<recpient_mail_address>", "Mail Notification",
            "This is our notification sent via mail.")

        Send_via_Mail_Switch.postUpdate(OFF)
    }
end
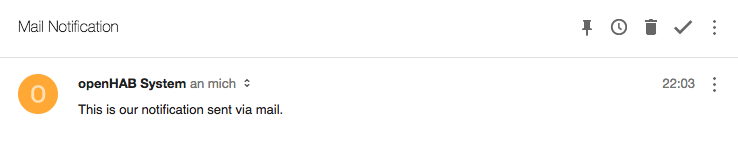
If we now trigger the switch in the Basic UI, a mail is sent. The screenshot below shows the example sent to my mail address.
Send Notifications to a Telegram Chat
Finally we will have a closer look at sending notifications to a Telegram chat. We will use the openHAB Telegram action. For further details not covered in this blog post, you can have a look at the documentation of this add-on.
First of all you need to create a Telegram account if you don’t already have one. Please follow these steps:
- Download the iOS app, the Android app or open the Web app. Necessary links are listed on the Telegram website.
- Enter the phone number of your smartphone.
- You will receive a code on your smartphone with the phone number you entered before.
- Type in the code to complete the registration.
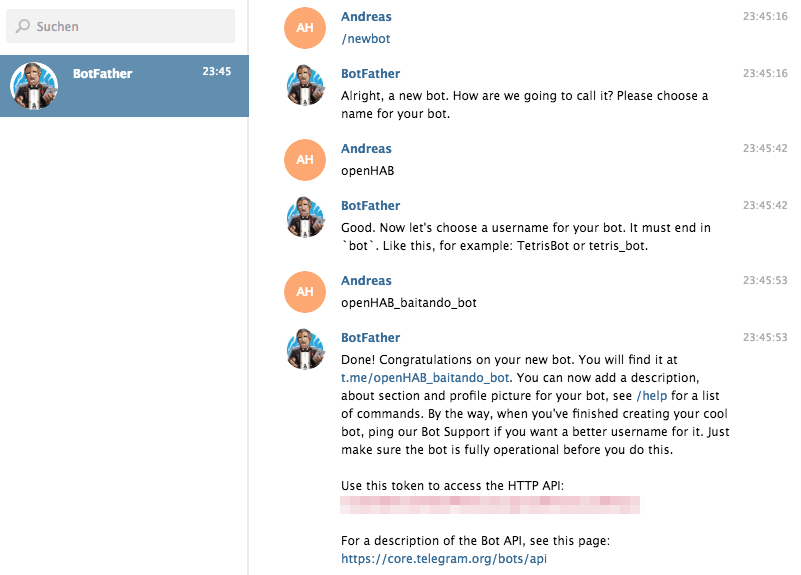
The notification mechanism in openHAB uses the Telegram Bot API. We will now create a new bot, which will be used to send the notifications.
- Open a new chat with
BotFatherin Telegram. You can do that by typing the name in the search field and selecting the entry. - Send the message
/newbot. - Give your new bot a name. I used
openHAB. This is used for display purposes. - Enter the username of the bot. It must be unique on Telegram and must end with
bot. I usedopenHAB_baitando_bot. TheBotFatherwill tell you if the name you entered is already in use. In this case you will have to choose a different one.
If this was successful, the token for accessing the HTTP API is shown. We will need this token later, so please write it down. The complete chat history is shown in the image below. The token is displayed where I blurred the red text.
The next step is to get the chat ID. Please follow the steps listed below.
- Open a new chat with your new chat bot.
- Send a message in this chat. I simply sent the message
Hello. - Open the URL
https://api.telegram.org/bot<token>/getUpdatesin your browser - but don’t forget to replace<token>with the token you generated before. - Your browser will show a JSON result. Please write down the value of
result[0].message.chat.id.
In my case the JSON content below is shown. The value we will need later is 474141047 in my case.
{
   "ok":true,
   "result":[
      {
         "update_id":494609500,
         "message":{
            "message_id":1,
            "from":{
               "id":474141047,
               "is_bot":false,
               "first_name":"Andreas",
               "last_name":"Hirsch",
               "language_code":"de-DE"
            },
            "chat":{
               "id":474141047,
               "first_name":"Andreas",
               "last_name":"Hirsch",
               "type":"private"
            },
            "date":1539987708,
            "text":"Hello"
         }
      }
   ]
}
Now we have all necessary values for the configuration. Let’s install the Telegram add-on. You can do this using the Paper UI like before. Just click on install and the add-on will be installed automatically. A screenshot is provided below.

The installation process automatically creates the telegram.cfg file in the /etc/openhab2/services directory. Please replace <chat_id> and <token> with the values you have written down.
bots=openHAB

openHAB.chatId=<chat_id>
openHAB.token=<token>
Finally we add a new rule (in my case in /etc/openhab2/rules/notifications.rules), which sends the Telegram notification once we trigger the switch in the Basic UI. The most important command is sendTelegram. It is called with two parameters.
- The first one needs to be the same value than used in the bot definition in
telegram.cfg. - The second parameter is the message itself.
The rule is shown below. Please make sure to adjust the parameters according to your needs. There are more features available, which are explained in the documentation. You can e.g. add images to your notification.
rule "Send Notification via Mail"
when
    Item Send_via_Telegram_Switch changed
then
    if(Send_via_Telegram_Switch.state == ON)
    {
        logInfo("notifications", "Sending notification via Telegram.")
        sendTelegram("openHAB",
            "This is our notification sent via Telegram.")

        Send_via_Telegram_Switch.postUpdate(OFF)
    }
end
This rule will send the Telegram message once we trigger the switch in the Basic UI. The screenshot below shows the sample message sent to my Telegram chat.

Conclusion
There are several types of notifications you can send from within your openHAB based smart home environment. This blog post described three of those notifications types. Feel free to adapt the samples shown here to your own needs. You can also refer to the openHAB documentation of the add-ons, if you want to enhance your notifications.
Besides the notifications types mentioned here, openHAB provides much more extensions you can use. You can search for them e.g. in the documentation or in the add-ons section of the Paper UI.
Leave A Comment
I'd love to hear your opinion and experiences. Share your thoughts with a comment below! Please note that comments will appear after moderation.