For some years I operated my own server at home. It was used as network file storage, as platform to run some self-developed web applications, as database server, and as host for the software development tooling like Jenkins and others. When I replaced this server with a Synology NAS I decided to make use of the Docker capabilities offered.
In this post I would like to share my experiences related to the initial setup and the creation of the first containers. All explanations are based on a Synology DS218+ NAS running the DSM operating system in version 6.2.2-24922 Update 3.
Motivation for Docker on the NAS
Because I lost the desire to maintain and run my own server at home, I replaced it with a NAS. I’m convinced that such a system is pretty sufficient for backups and file sharing within my network. Nevertheless it was necessary to think about the migration path from the server to the NAS.
It was no big deal to find a solution for the software development tooling, because there are plenty of Software as a Service offerings which are not too expensive or even for free.
The more important question was what I would do with some databases and how I could run some web applications I implemented myself. This software is only used in my private network, i.e. there is no compelling reason to run that outside. I remembered my colleague, who runs a containerized openHAB instance as his smart home solution on his NAS (for further details on this I recommend you to have a look at his blog post).
As a software engineer I already used Docker, but I was skeptical if a NAS is sufficient to run multiple containers in parallel. Due to the fact that the NAS is permanently up and running, I decided that it’s definitely worth a try.
Prepare the NAS
First of all we have to install Docker. Simply open the Synology Package Center, search for Docker and install the package. Once you installed it, the Docker detail page in the Synology Package Center should look like the screenshot below.
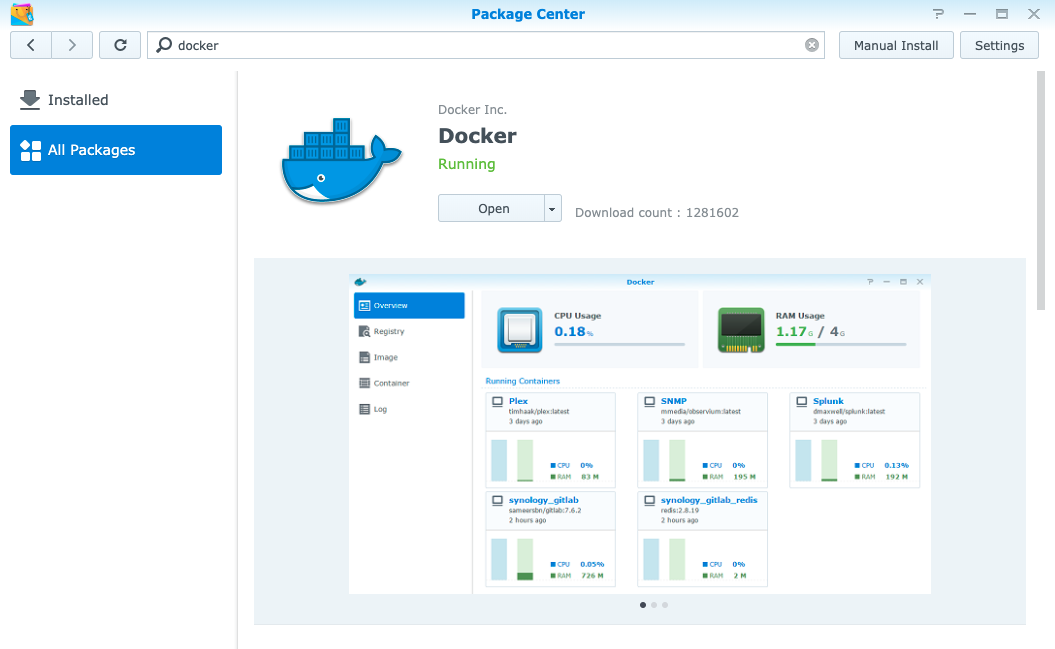
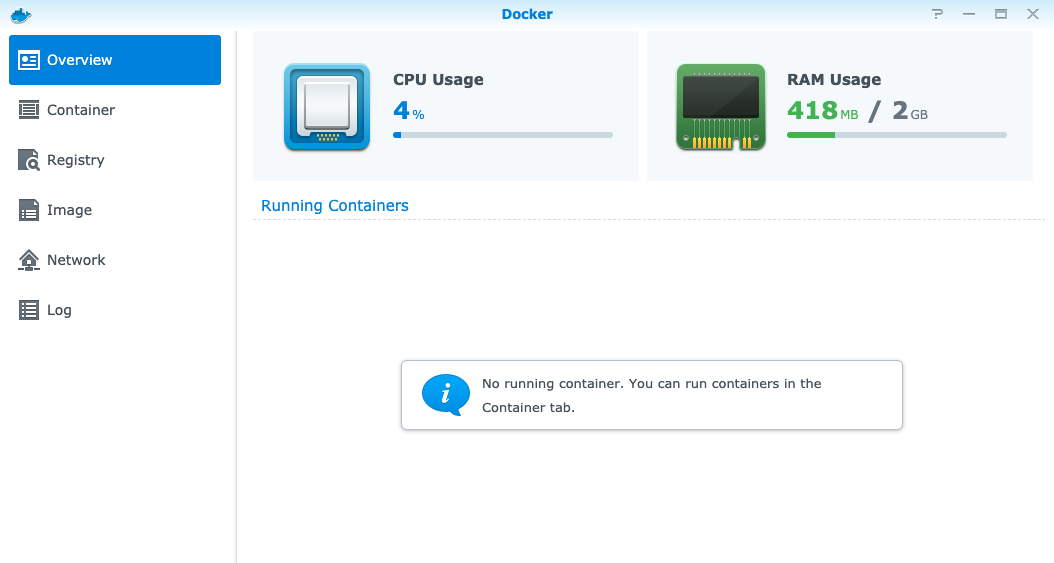
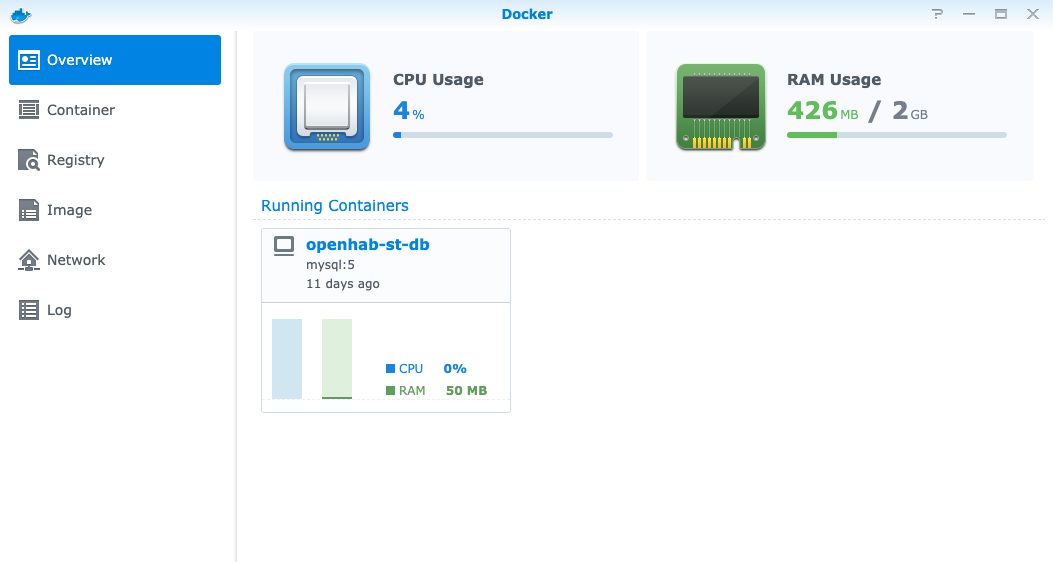
You can then open the Docker package. The overview page should appear and show some information about CPU and RAM usage as well as the running Docker containers.
Installing Docker was of course the most important step. As additional preparation I recommend to spend some thoughts on where to store persistent data of the Docker containers. I decided to create a dedicated shared folder on the NAS which is used for exactly this purpose. Creating such a shared folder should be pretty straightforward if you own and use a NAS.
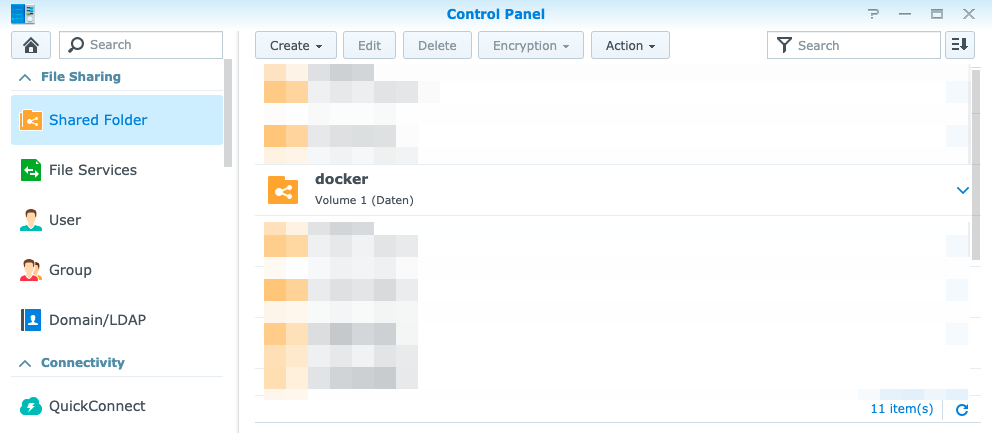
Using a dedicated shared folder for persistent volumes will also simplify backups, which we should consider later.
Create Containers from Public Images
I need several MySQL databases, which should run as Docker containers. To create one, please open the Docker package, go to the registry section and and search for the image by name. Then double-click on the entry in the list and select the desired version of the image.
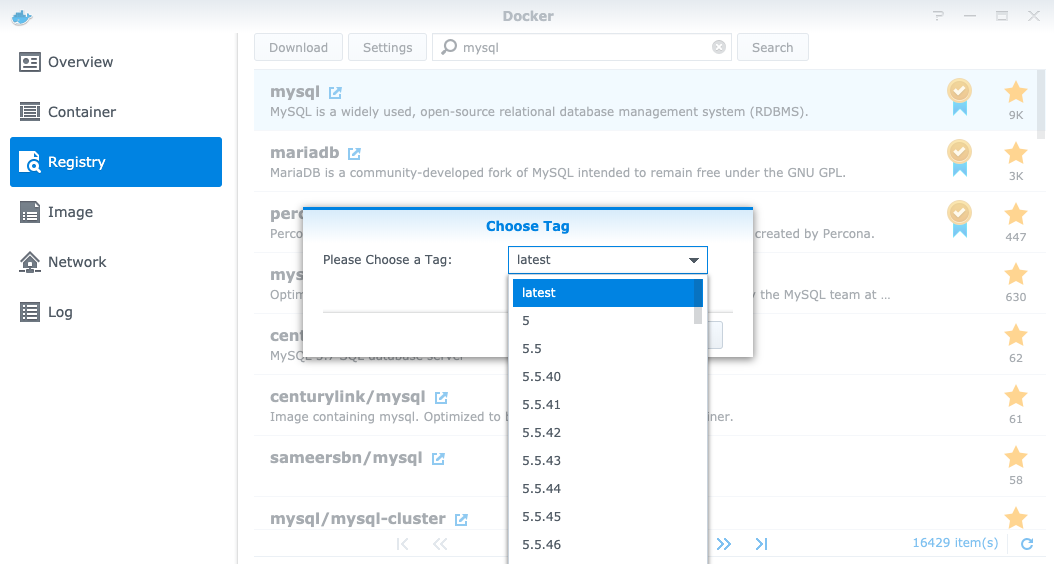
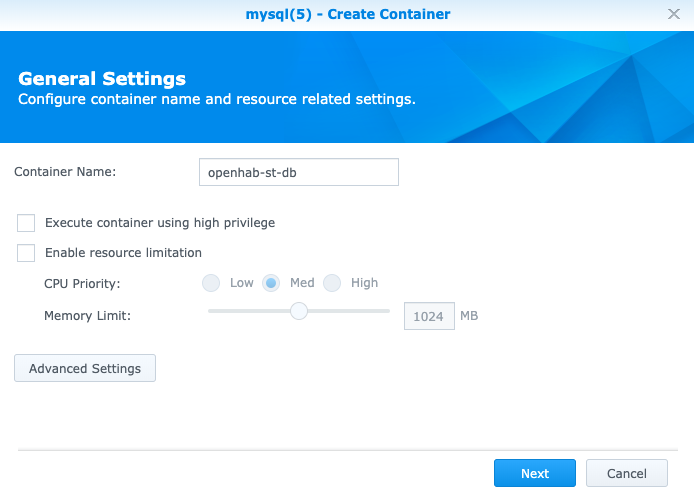
Then go to the image section where you will see that the image is being downloaded. Once it is fully available, select the image from the list and click on launch. Enter the name you want to use for the new container. For further configuration like port mappings, volumes, networks etc. there is a separate dialog available. Switch to it by clicking on the button for advanced settings.
The first setting is related to the restart behavior. I want the container to be automatically started. Therefore the checkbox needs to be enabled.
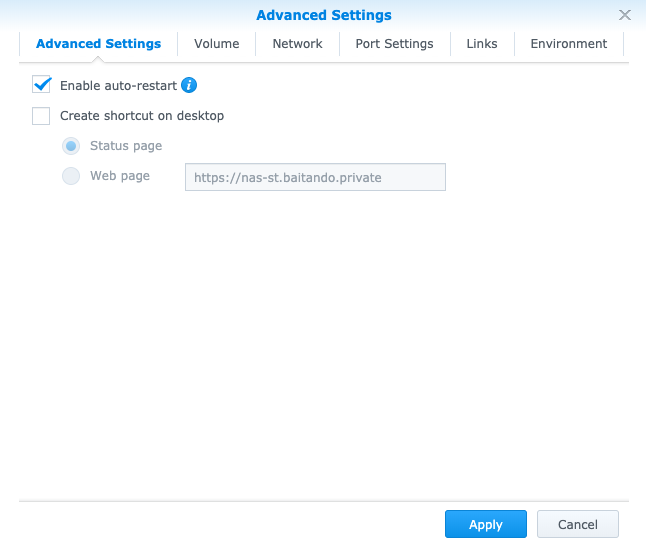
The next setting is the definition of the volumes to use.
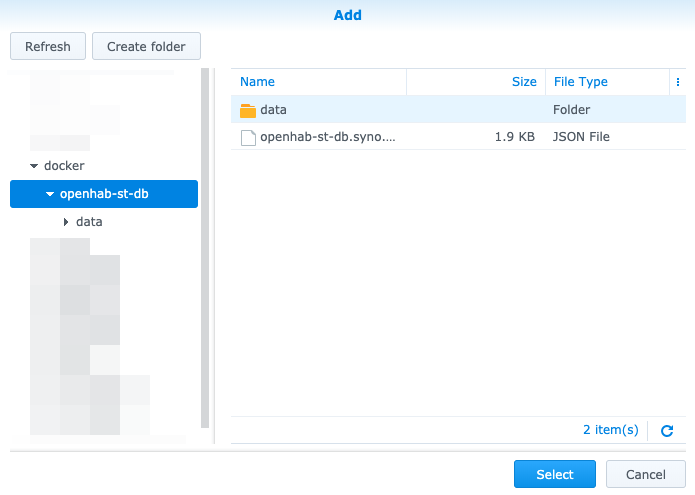
In case of a MySQL database we have to mount the directory /var/lib/mysql inside the container to a directory on the NAS.
This can be achieved in the volumes section of the dialog where you can create and pick an appropriate folder, e.g. inside the previously created shared directory.
There I usually create a folder per container.
As a next step it makes sense to configure some environment variables. This can be used to set the credentials of the MySQL server. I won’t go into details about this, because this is not specific for the Synology NAS but general Docker configuration.
I needed some more databases for my setup and also some other containers created from publicly available images. This should be easy to reproduce.
Managing Containers
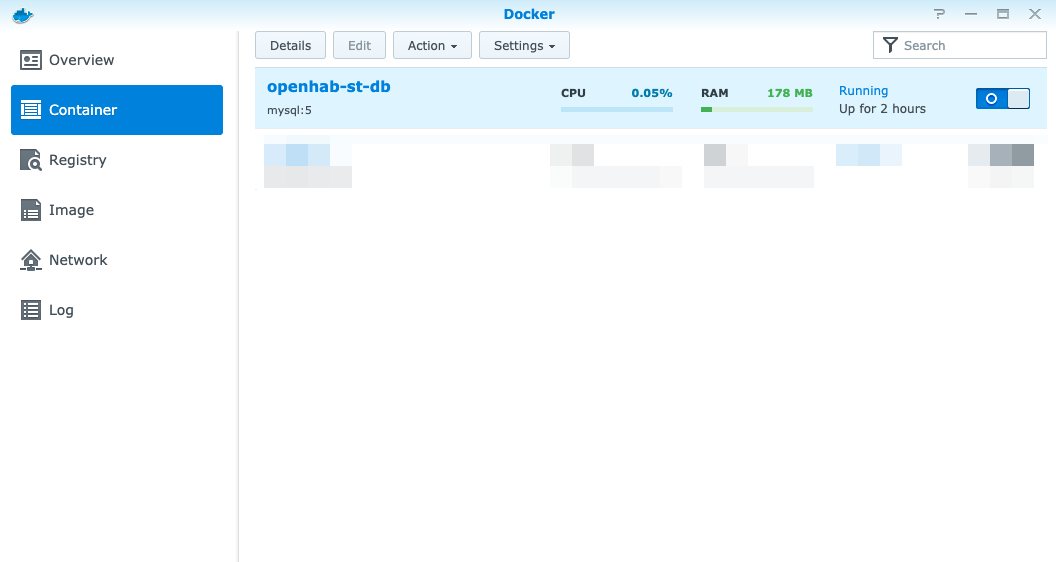
A nice thing is that there is an overview section available in the Synology user interface. It shows all containers and some details together with information about the current resource utilization in total and per container.
Besides this overview there is the container section which can be used to start, stop and manage containers. It shows all containers in a list and offers several actions if you select one of the containers.
Backup Considerations
It sounds like a good idea to also think about backups of the containers you run on the NAS. If you store all volumes on a dedicated shared directory, it should be pretty easy to create backups of all volumes. You can simply copy the directory to a safe location and you can easily automate this.
Creating backups of the volumes is an important step. To make the restore process easier it makes sense to also create a backup of the container configuration. Personally I use the export functionality offered by Synology. If you go to the container overview and select one of the containers, you can trigger the export action which is located in the settings menu.
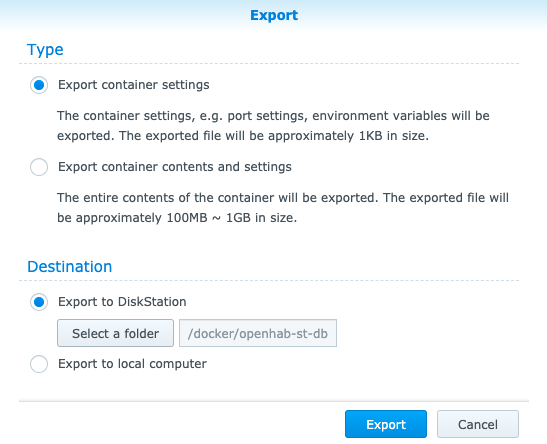
Based on the shared folder approach, I store the exported file in the directory where also the container volumes are stored. As a result you have the persistent volumes as well as the container configuration in one place.
It is pretty sufficient to do this export step manually, because the configuration only changes if you modify the container configuration. This won’t happen too often.
Conclusion
In this post we had a closer look at how we can create and run Docker containers on a Synology NAS using the Docker package offered in the Synology Package Center.
The explanation was focused on the specifics of running Docker on such a NAS. It also mentioned some practices I identified as useful ones for my use cases.
What we have seen are simpler cases in which publicly available images provided by the Docker Hub were used. Another interesting question is how to handle private images. This can be done by using a private Docker registry, which can be operated as a Docker container on the Synology NAS. My findings on this will be the topic of one of the next blog posts.
Leave A Comment
I'd love to hear your opinion and experiences. Share your thoughts with a comment below! Please note that comments will appear after moderation.